Delete ISO
March 7, 2024
Tags:
·
·
·
Create an Utho account to try this guide with a $100 credit.
Sign Up
How to Delete an Added ISO
Overview
The Delete ISO feature allows you to remove an ISO file from your Utho Cloud account. This ensures that you can keep your account clean and organized by removing ISO files that are no longer needed. Once deleted, the ISO cannot be recovered unless re-uploaded.
Login or Sign Up
- Visit the Utho Cloud Platform login page.
- Enter your credentials and click Login .
- If you’re not registered, sign up here.
Steps to Delete an Added ISO
- Navigate to the ISO Listing Page
- Once logged in, go to the ISO Listing Page by selecting ISO from the sidebar or by clicking here.
- Find the ISO to Delete
- In the list of uploaded ISOs, find the ISO file that you want to delete. You can identify it by its Name , Size , and Location information.
- Click the Delete Icon
At the end of the ISO entry, you’ll see a Delete icon (trash can icon). Click on this icon to initiate the deletion process.

- Confirm Deletion
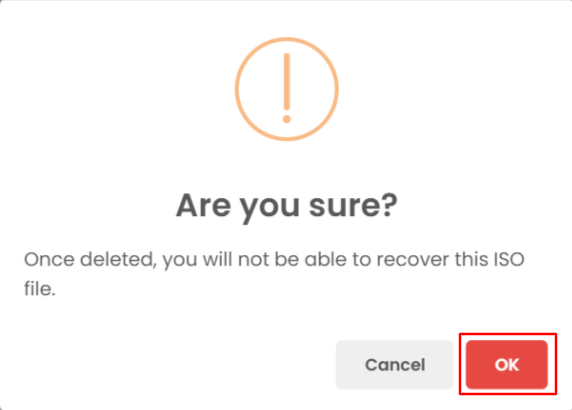
A modal window will appear asking you to confirm that you want to delete the ISO.
Click OK in the modal to confirm the deletion. If you change your mind, click Cancel to abort the process.

- Verify the Deletion
- Once the ISO has been deleted, it will no longer appear in the ISO Listing Page .
- To verify, you can check the updated list of ISOs. The deleted ISO will be removed from the list, confirming that the deletion was successful.

Create an Utho account to try this guide with a $100 credit.
Sign Up