Attach NAT Gateway
How to Attach a NAT Gateway to a Subnet in Utho Cloud
Overview
Attaching a NAT Gateway to a subnet in Utho Cloud allows resources within the subnet to access the internet via the NAT Gateway, ensuring efficient management of outbound traffic. By following a few simple steps, users can easily attach a NAT Gateway to a subnet and verify the attachment.
1. Login to Utho Cloud Platform
- Visit the Utho Cloud Platform’s Login page.
- Enter your credentials and click Login .
- If you’re not registered, sign up here .
2. Navigate to the Subnet Listing Page
- On the left sidebar of the platform, look for the VPC menu item.
- Under the VPC section, select Subnets (subsection).
- Clicking on Subnets will redirect you to the Subnets Listing Page , where you can view all the subnets created within your account.
You can also access the Subnets listing directly by clicking this link to Subnet Listing.
3. Select the Subnet and Open the Manage Page
In the Subnets Listing Page , choose the subnet to which you want to attach a NAT Gateway.
At the end of the subnet item, click the “Manage” button to open the Manage Page of that subnet.

4. Navigate to the “NAT Gateway” Tab
On the Manage Page of the subnet, locate and click on the “NAT Gateway” tab.
This tab will display the list of NAT Gateways currently attached to the subnet.

5. Add a NAT Gateway to the Subnet
In the “NAT Gateway” section, click the “Add NAT Gateway” button.
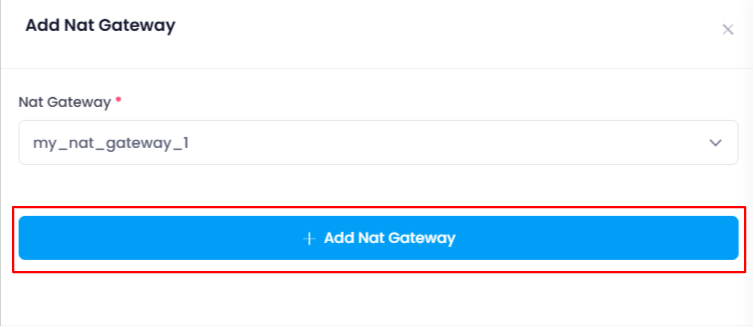
This will open a drawer where you can configure the NAT Gateway to attach.
In the drawer, you will see a dropdown titled “NAT Gateway” that lists all the available NAT Gateways.
Select a NAT Gateway from the list that you wish to attach to the subnet.
After selecting the desired NAT Gateway from the dropdown, click the “Add NAT Gateway” button.

6. Verify the Attachment
This will attach the selected NAT Gateway to the subnet.
A success notification will appear confirming the attachment.
To verify, go back to the “NAT Gateway” tab and check the list of attached NAT Gateways. You should see the newly added NAT Gateway in the list.

Conclusion
Attaching a NAT Gateway to a subnet in Utho Cloud is a simple process. By following these steps, users can quickly link a NAT Gateway to their desired subnet and verify the attachment. This allows your subnet’s resources to communicate efficiently with the internet while maintaining security and control over outbound traffic.