Upload files in ticket reply
March 7, 2024
Tags:
·
·
·
·
Create an Utho account to try this guide with a $100 credit.
Sign Up
How to Upload Files in Ticket Reply
Overview
The Upload Files in Ticket Reply feature allows you to attach documents or files to your ticket replies. This helps you share important files related to your issue, making it easier for the support team to understand and resolve your query more effectively.
Login or Sign Up
- Visit the Utho Cloud Platform login page.
- Enter your credentials and click Login .
- If you’re not registered, sign up here.
Steps to Upload Files in Ticket Reply
- Navigate to the Ticket Listing Page
Access the Ticket Listing Page by clicking here.
Locate the ticket you want to reply to and click the Manage button next to it to open the Manage Page .

- Go to the Manage Page of the Ticket
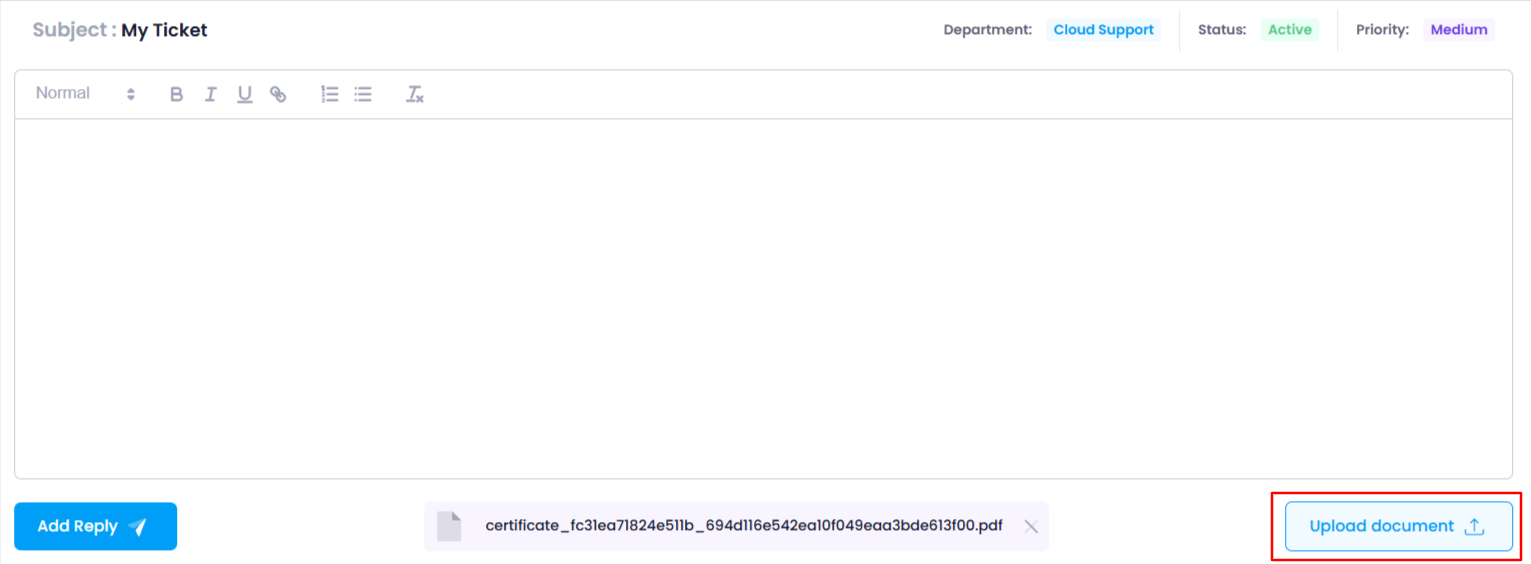
- In the Manage Page , you will see the Reply Text Editor where you can type your message.
- Click the “Upload Document” Button
- Below the reply text editor, on the right side , you will see the “Upload Document” button.
- Click on this button to open the default file upload window.

- Select the Document to Upload
- In the file upload window, choose the document you want to upload and click Open .
- The document will be attached to your reply.
- Verify the Uploaded Document
After selecting the file, the name of the uploaded document will be displayed right below the reply text editor .
If you want to remove the uploaded document, click the cross icon next to the document name.

- Click the “Add Reply” Button
- After attaching the document and typing your reply, click the Add Reply button.
- The reply along with the uploaded document will be sent to the support team.
Create an Utho account to try this guide with a $100 credit.
Sign Up