How to Create a Self-Signed Certificate in Windows Server
INTRODUCTION
In cryptography and computer security, self-signed certificates are public key certificates that are not issued by a certificate authority. These self-signed certificates are easy to make and do not cost money. However, they do not provide any trust value. On modern Windows versions (Windows Server 2022/2019/2016/2012R2) you can create a self-signed certificate using the built-in PowerShell cmdlet [New-SelfSignedCertificate](https://learn.microsoft.com/en-us/powershell/module/pki/new-selfsignedcertificate?view=windowsserver2022-ps) without using additional tools. In this tutorial, we will learn how to Create a Self-Signed Certificate in Windows Server.
Prerequisites
Windows Server
PowerShell with Administrator
Internet connectivity
Step 1. Login to your Windows Server
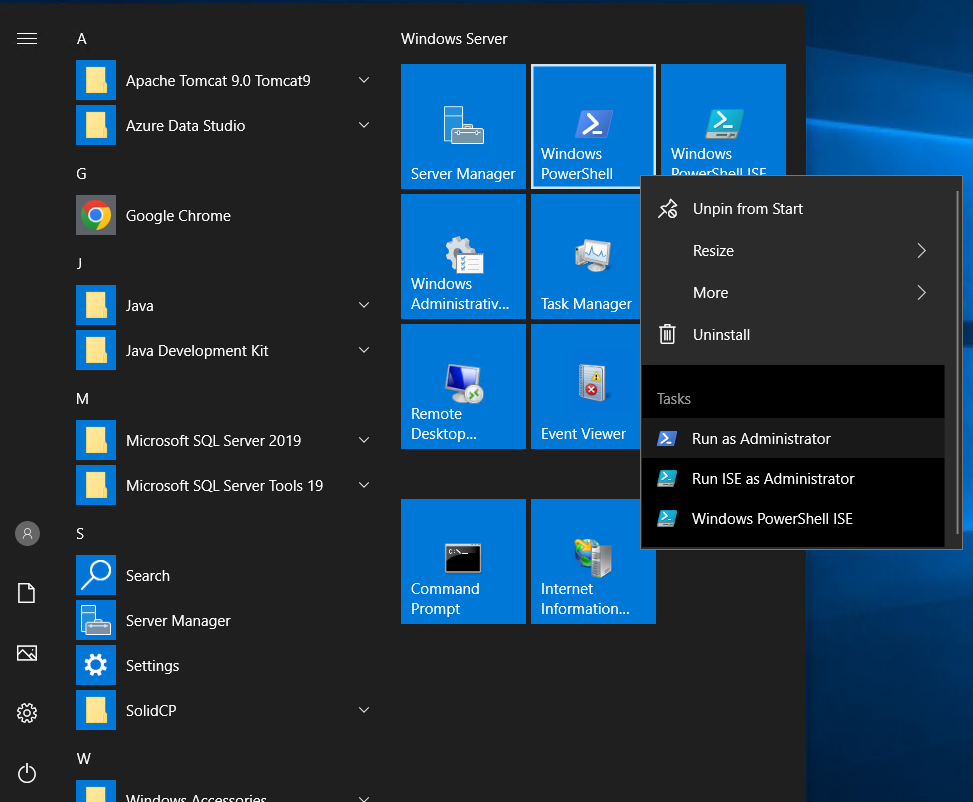
Step 2. Open PowerShell with Administrator
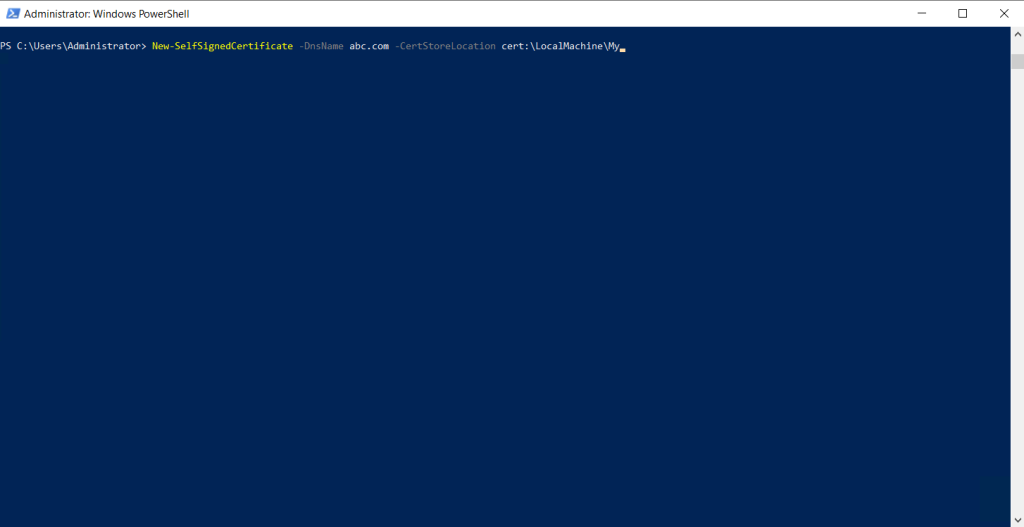
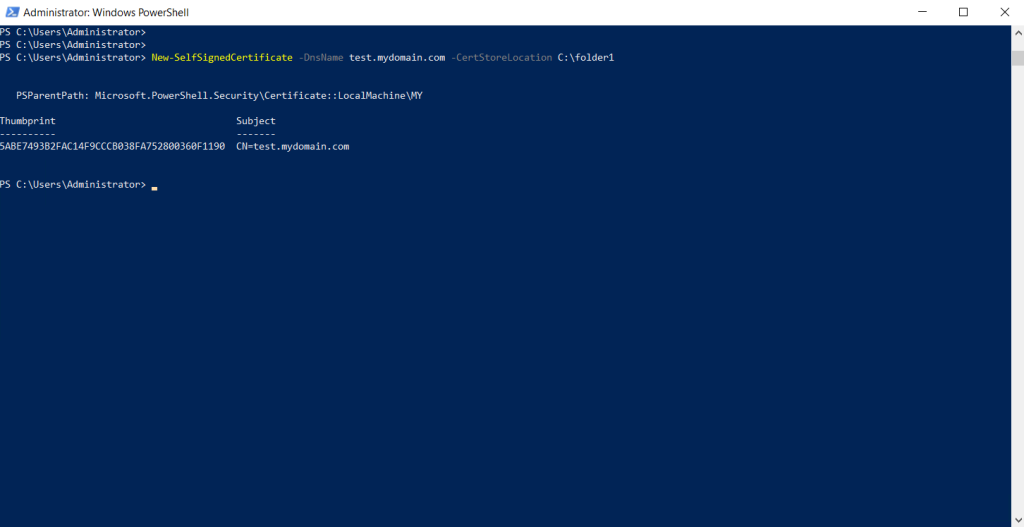
Step 3. Run the following command to generate a self-signed certificate
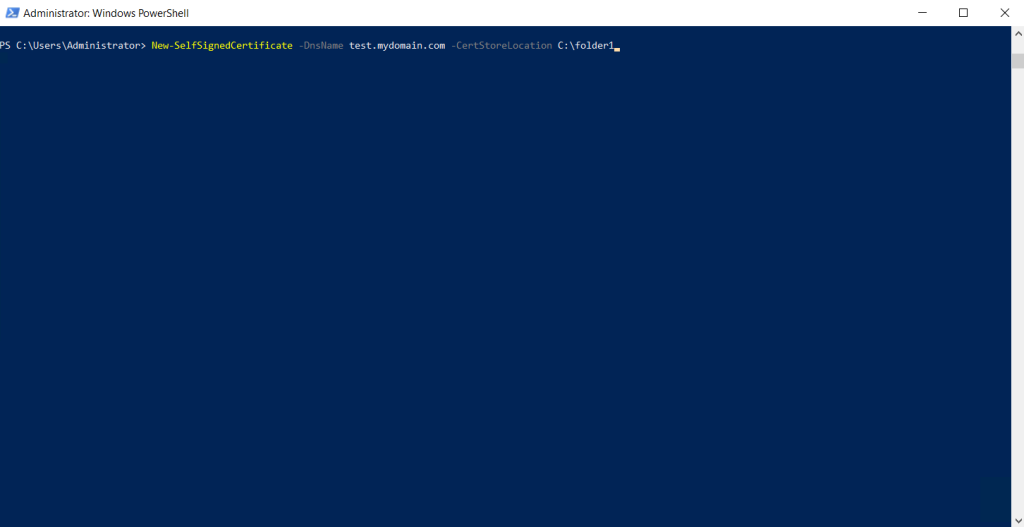
Step 4. We will edit the domain name and certificate location according to our preference.
Step 5. Self-signed certificate generated.
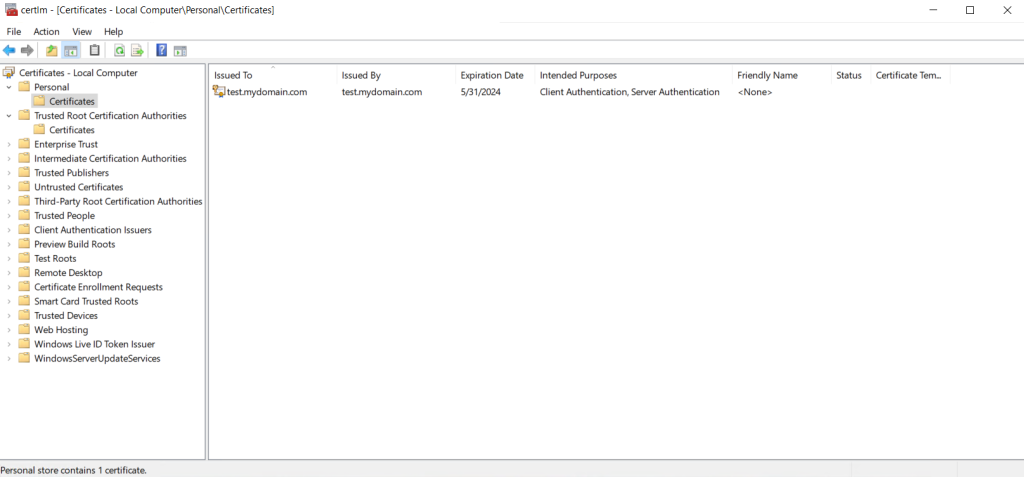
Step 6. Check our recently generated self-signed certificate by running certlm.msc in run.
Thank You!