How to add CNAME record in Plesk

Introduction
In this article, you will learn how to add CNAME record in Plesk.
Inside the Domain Name System (DNS), there is a specific kind of resource record known as a Canonical Name (CNAME) record. This record transfers one domain name (an alias) to another (the canonical name).
Step 1. Log into your Plesk with your server password by searching server_ip:8880 in your browser.

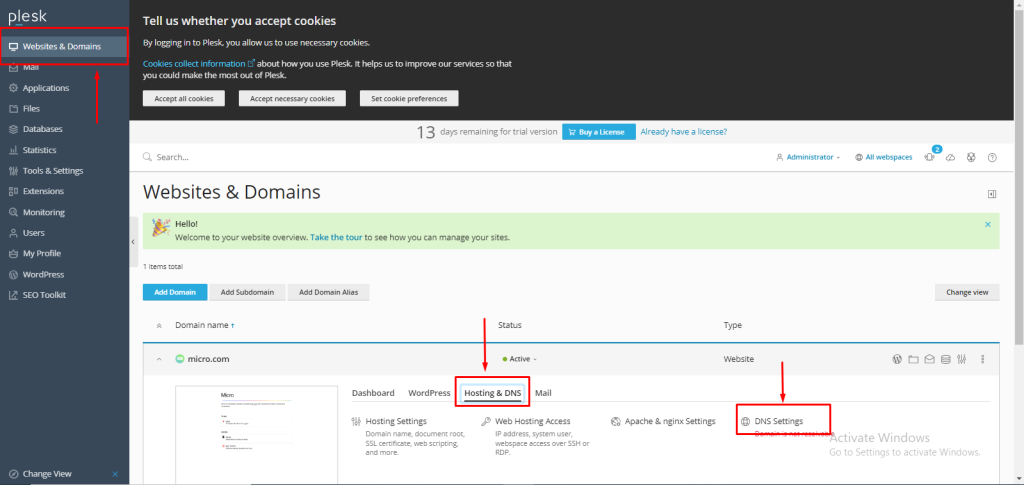
Step 2. Go to Hosting and DNS under the menu of websites and domains, then click on DNS settings.
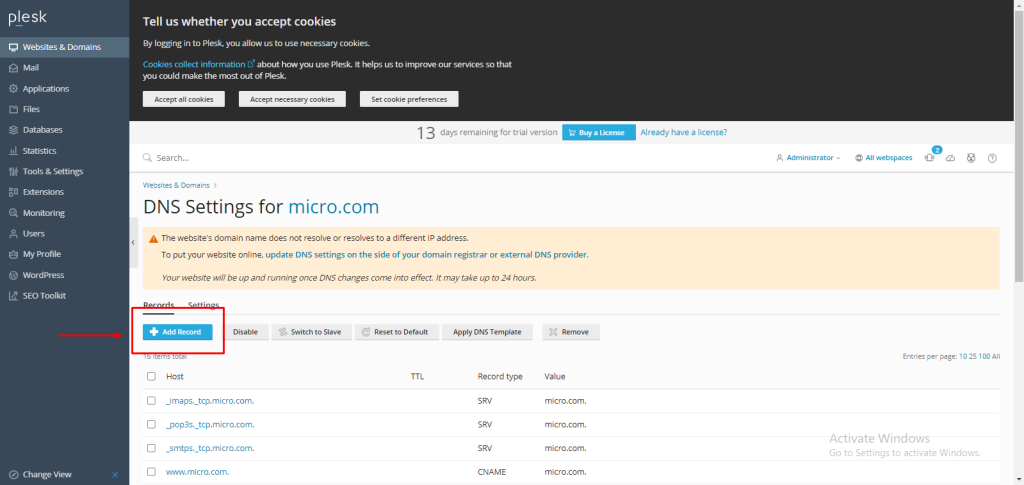
Step 3. Click on "Add Record."
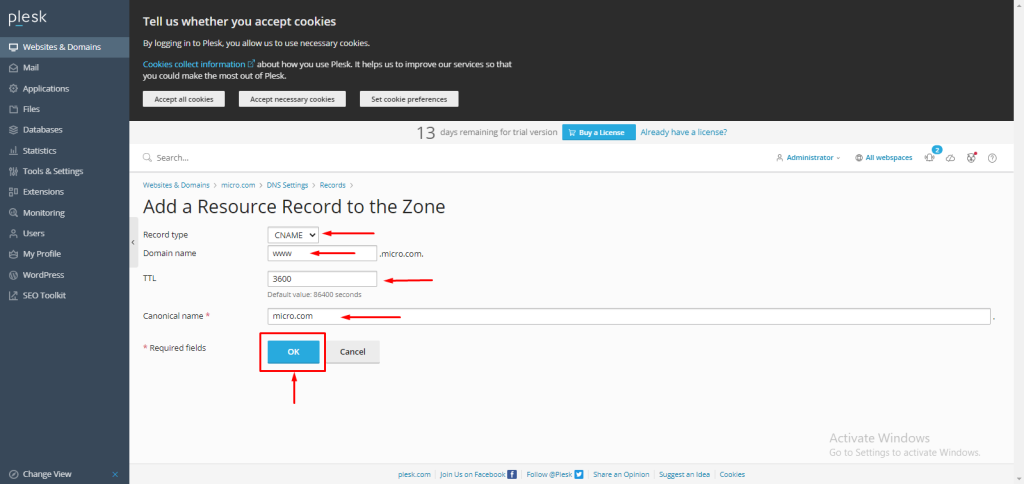
Step 4. Select CNAME record from the record type drop-down menu.
Enter the subdomain name in the domain name field; in our case, we used www.
In the TTL field, you can assign any value in seconds; we have entered 3600.
In the canonical name field, I entered the canonical name as micro.com for the main domain. then select OK.
NOTE: Use your main domain instead of micro.com.
Conclusion
Hopefully, now you have learned how to add CNAME record in Plesk.
Also read: How to add MX record in Plesk.
Thank You 🙂