AutoScale Unleashed: Step-by-Step Guide for Implementation
AUTOSCALING
DEPLOYING AUTOSCALING USING UTHO CLOUD DASHBOARD
Step 1: Login to your Utho Cloud Dashboard.
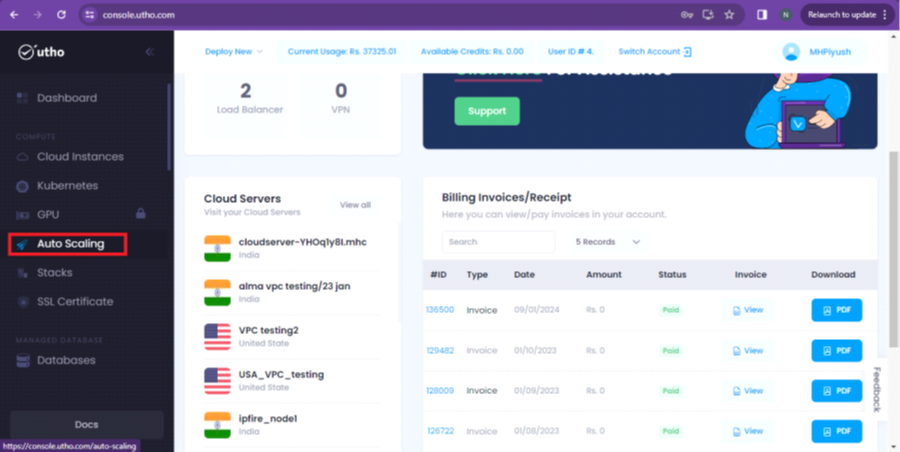
Step 2: Now, click on the Autoscaling option as per the screenshot given below.
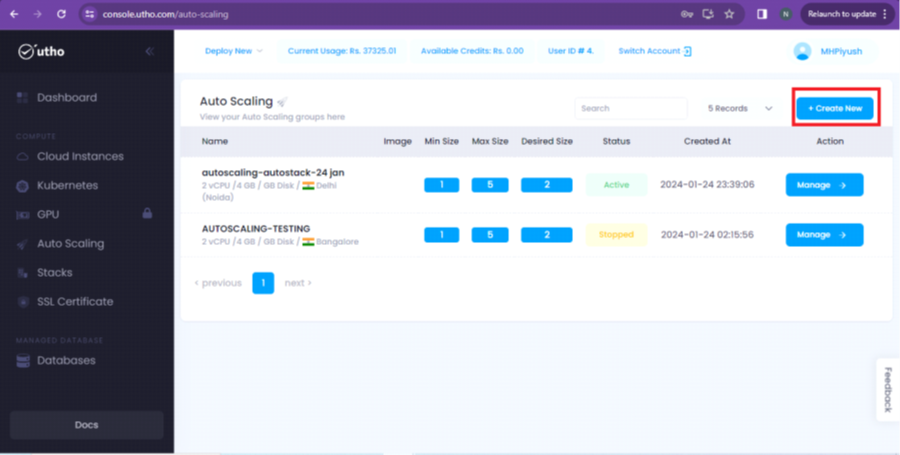
Step 3: You will be redirected to a new page, where we have to select the “Create New” button.
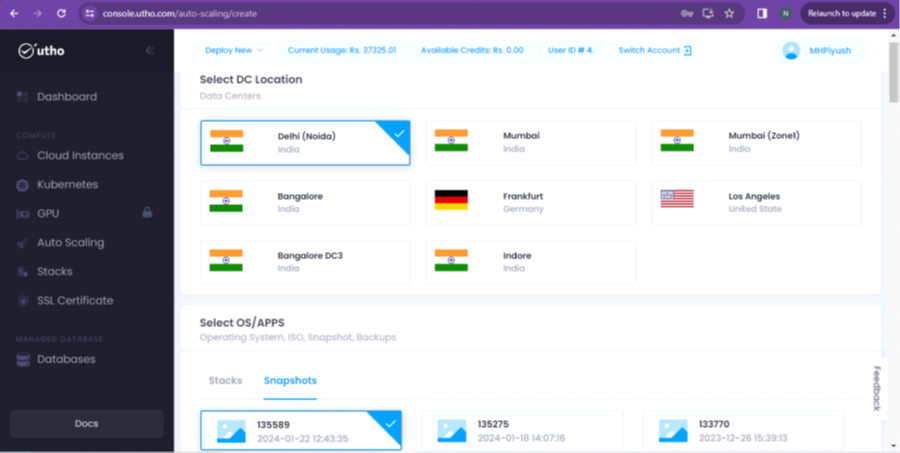
Step 4: Afterward, we will see a new page, where you have to choose a data center location and a Snapshot/Stack (you can attach your own stacks here) as per given in the screenshot.
Step 5: Now, proceed with selecting the configuration of the server.

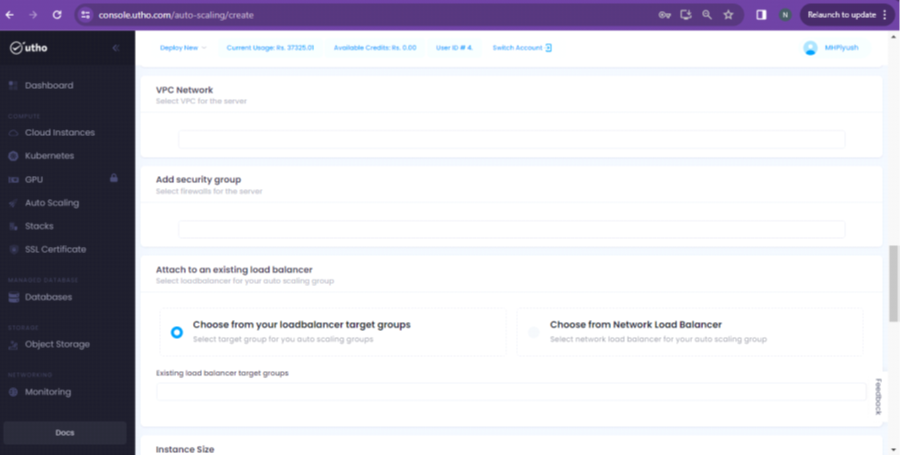
Step 6: In the next step, you can specify a VPC, SECURITY GROUP and LOAD BALANCER as per your requirement.
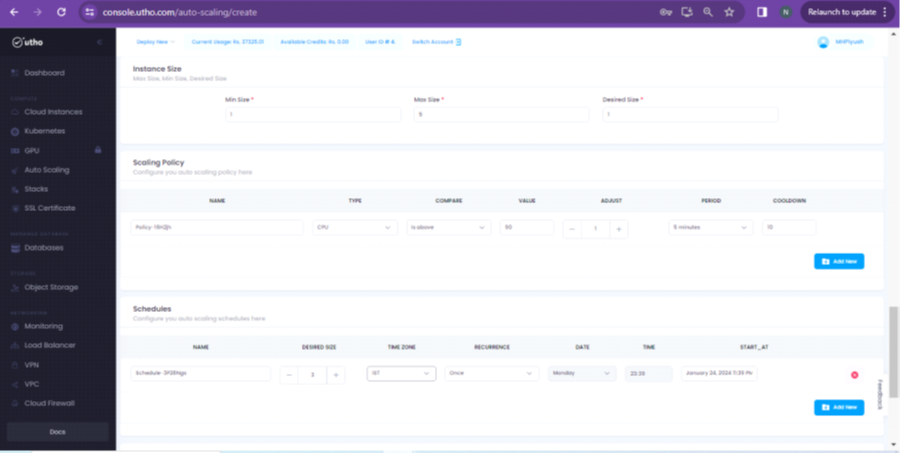
Step 7: Scrolling down on the same page, you will get the option of Instance size, Scaling Policy and Schedules. Please make the changes according to your requirement.
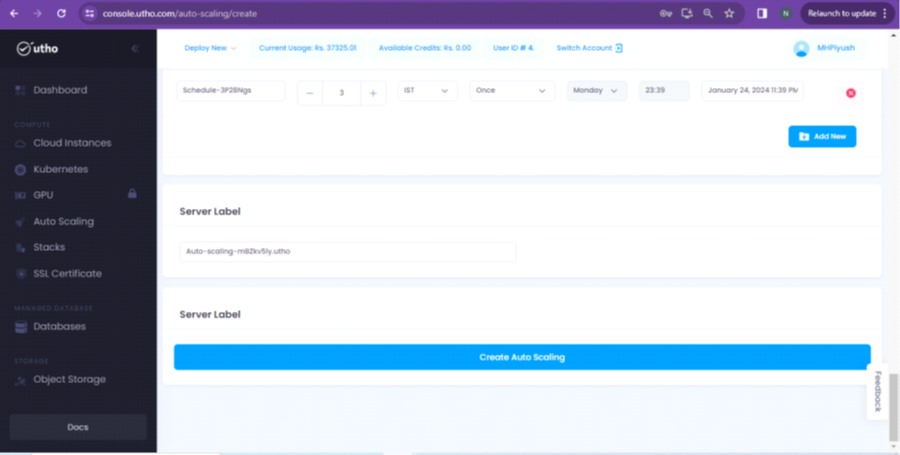
Step 5: In the end, you will get the option to specify the Server label(this will reflect in server name) along with the button of Create Auto Scaling. Please see the screenshot for your reference.
After clicking on “Create Auto Scaling” , the service will be created of selected configuration. We can see the details of the same in the “Auto Scaling” section of the dashboard.