How to create DFS NameSpaces via PowerShell
INTRODUCTION
DFS is a set of client and server services that allow an organization using Microsoft Windows servers to organize many scattered SMB file shares into a distributed file system. DFS has two components to its service: Location transparency and Redundancy. Basically a distributed file system (DFS) is a file system that spans across multiple file servers or multiple locations, such as file servers that are situated in different physical places. Files are accessible just as if they were stored locally, from any device and from anywhere on the network. In this tutorial, we will learn how to create DFS NameSpaces via PowerShell.
Prerequisites
-
PowerShell with Administrator rights
-
Internet connectivity
Step 1. Login to your Windows Server
Step 2. Open PowerShell as an Administrator
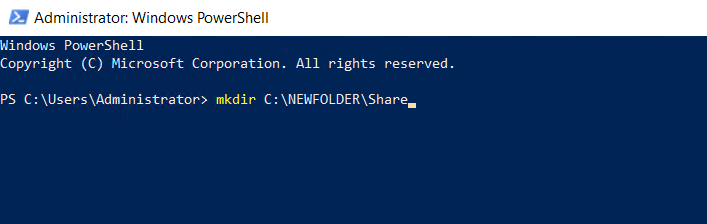
Step 3. Run the following command to create a folder for DFS Namespace share
mkdir C:\NEWFOLDER\Share
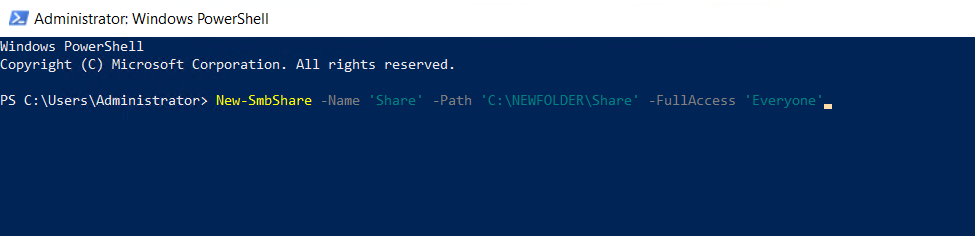
Step 4. Run the following command to set smbshare for DFS Namespace
New-SmbShare –Name 'Share' –Path 'C:\NEWFOLDER\Share' -FullAccess 'Everyone'
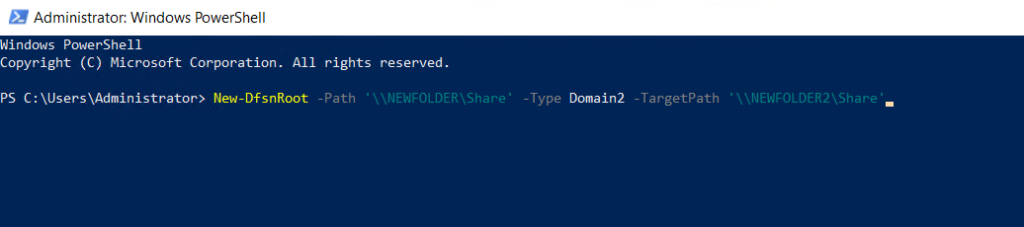
Step 5. Run the following command to create DFS namespace
-Path (path of share)
-Type (standalone , Domain1 , Domain2)
-TargetPath (target share path : the one created above)
New-DfsnRoot -Path '\\NEWFOLDER\Share' -Type DomainV2 -TargetPath '\\NEWFOLDER2\Share'
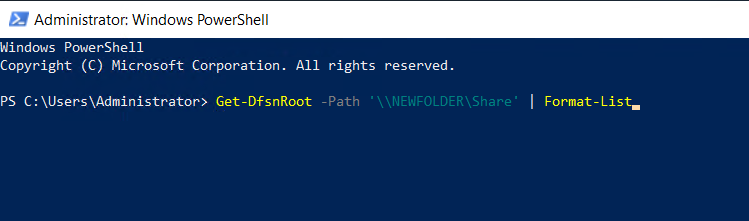
Step 6. Run the following command to confirm path
Get-DfsnRoot -Path '\\NEWFOLDER\Share' | Format-List
Thank You!