How to change RDP port via PowerShell in Windows server
Introduction
In this article, you will learn how to change RDP port via PowerShell in Windows server.
The Remote Desktop Protocol, also known as RDP, is a proprietary protocol developed by Microsoft that enables users to remotely connect to other computers, most commonly through TCP port 3389. A distant user can gain access to the network using its encrypted communication channel.
The Windows Remote Desktop (RDP) port 3389 is a popular target for hackers. So, it may make sense to alter the RDP port. This article describes how to change RDP port via PowerShell in Windows server 2012/2016/2019.
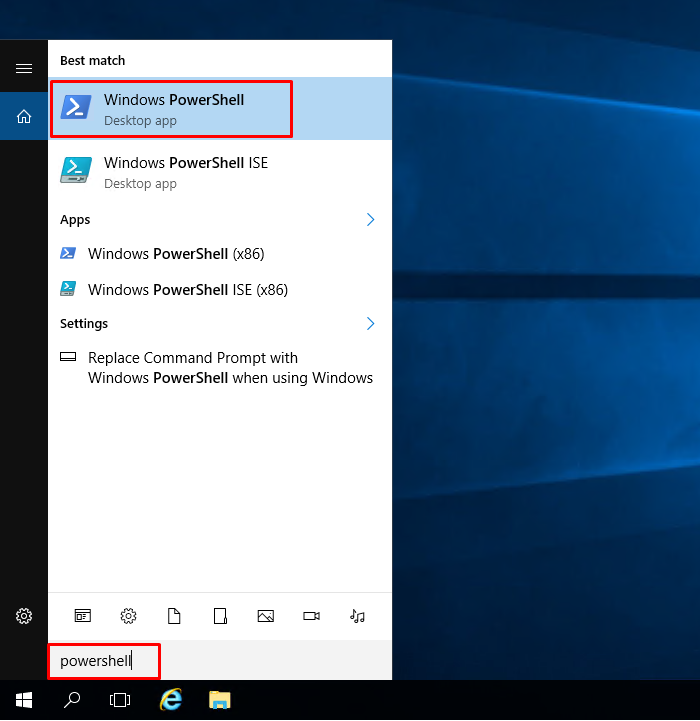
Step 1. In the search box, type PowerShell.
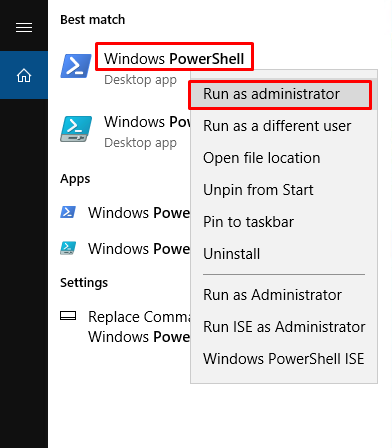
Step 2. Run PowerShell as an administrator.
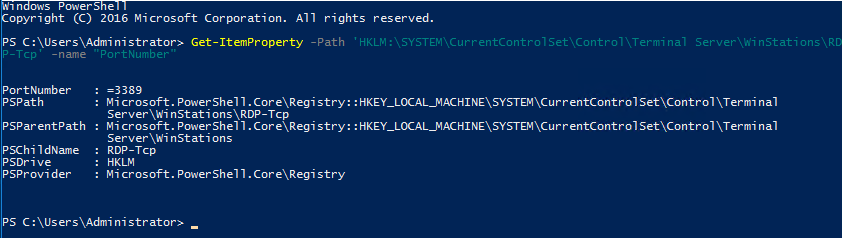
Step 3. To determine the current RDP port, use the command below.
# Get-ItemProperty -Path 'HKLM:\\SYSTEM\\CurrentControlSet\\Control\\Terminal Server\\WinStations\\RDP-Tcp' -name "PortNumber"
Step 4. To change the RDP port, run the below command and change the port as per your own.
# Set-ItemProperty -Path 'HKLM:\\SYSTEM\\CurrentControlSet\\Control\\Terminal Server\\WinStations\\RDP-Tcp' -name "PortNumber" -Value $portvalue=new\_port\_number

Step 5. Run the below command to check the newly set RDP port.
# Get-ItemProperty -Path 'HKLM:\\SYSTEM\\CurrentControlSet\\Control\\Terminal Server\\WinStations\\RDP-Tcp' -name "PortNumber"

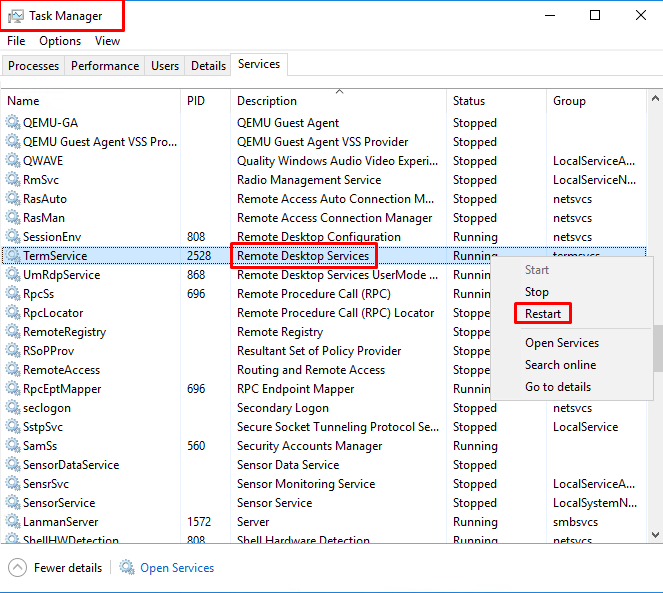
Step 6. To reflect the changes, restart the RDP services from the Task Manager.
Conclusion
Hopefully, now you have learned how to change RDP port via PowerShell in Windows server.
Also read: How to Block or Allow TCP/IP Port in Windows Firewall
Thank You 🙂