How to mount NFS persistently in Windows Server
NFS allows a system to share directories and files with others over a network. By using NFS, users and programs can access files on remote systems almost as if they were local files.
In other words, Network File System (NFS) is a file sharing solution that allows you to transfer files using the NFS protocol between computers running Windows Server and UNIX operating systems.
Steps to mount NFS Persistently in Windows Server
By Mapping Network Drive
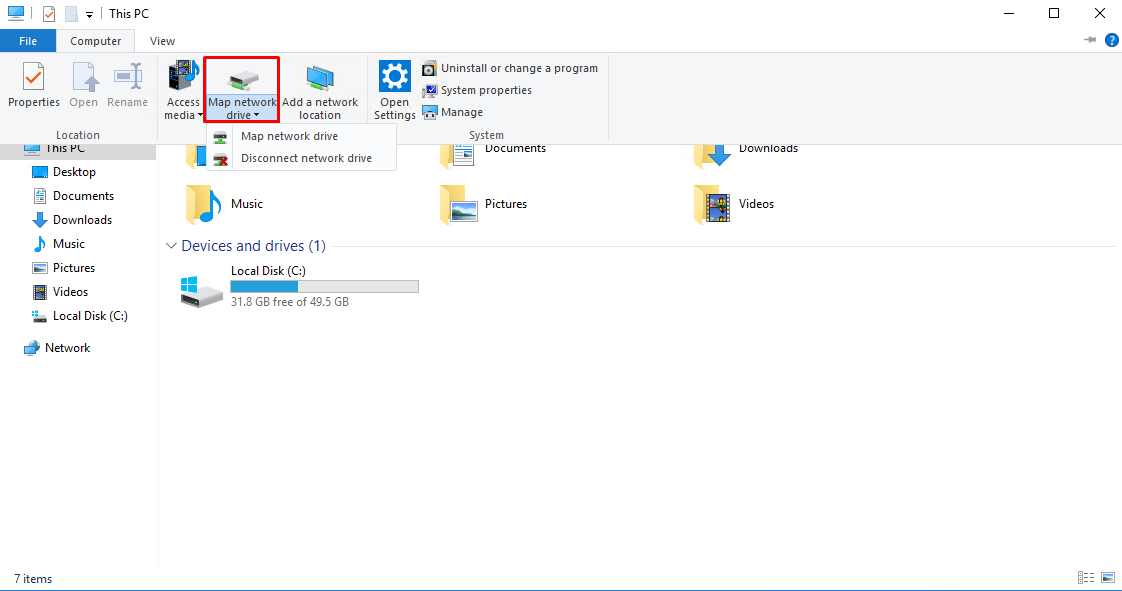
- First open up “This PC” and select Computer from the menu at the top. From here click on Map network drive, as shown below.
- The Map Network Drive window will open, select the drive letter that you want to assign to the NFS share, followed by the IP address or hostname of the NFS server as well as the path to the exported NFS directory. Click the Finish button when complete.

- You may see a pop up window showing that the connection is being attempted. Once complete the shared NFS folder will open up.
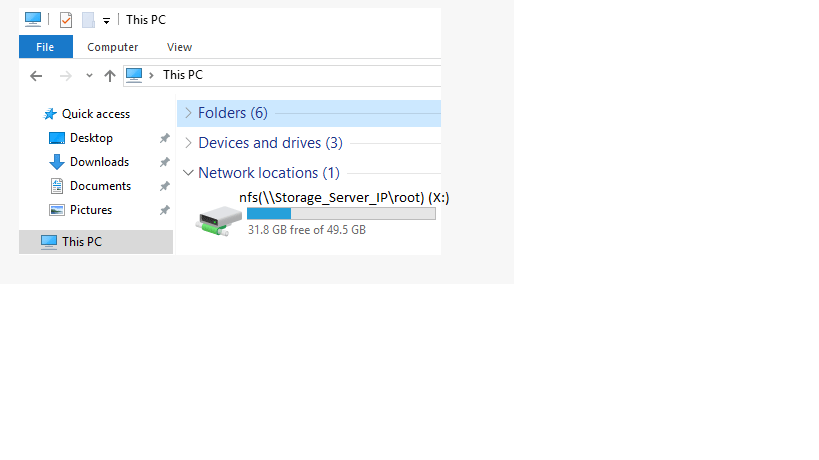
When you view “This PC” you will see the mapped network drive under Network location.
Thankyou