How to install Gradle on CentOS 7

Introduction
In this article, you will learn how to install Gradle on CentOS 7.
The build automation toolkit known as Gradle is available for free and under an open source license. It is modelled around Apache Ant and Apache Maven. A software project's full development lifecycle may be supported by the Gradle platform, which is provided by the tool.
Step 1: System update
It is actually recommended that you update the system on the CentOS server instance you are using before installing any packages. To bring the system up to date, you will need to log in as the sudo user and then perform the following instructions.
# yum -y install epel-release
# yum -y update
Step 2: Install JDK
In order to function, Gradle needs a version of the Java Development Kit (JDK) that is 7 or above. The installation of JDK 8 will be covered in this guide. To install JDK 8 on your server, you will need to run the following command.
# yum -y install java-1.8.0-openjdk wget unzip
Using the above command will also install the wget and unzip programmes. Make sure the installation is correct.
# java -version

Step 3: Download Gradle
There are two different varieties of the Gradle distribution archive: "binary-only" and "complete." The "full" package includes not only the binary but also the documentation and the source code for the Gradle programme. The "binary-only" archive just contains the Gradle software itself. In order to download Gradle to your computer, use the following command.
# wget https://services.gradle.org/distributions/gradle-3.4.1-bin.zip
Step 4: Install Gradle
Create a directory for the Gradle installation to take place in.
# mkdir /opt/gradle
Extract the archive that you downloaded into the directory that you just established.
# unzip -d /opt/gradle gradle-3.4.1-bin.zip
Set the value of the PATH environment variable so that the gradle executable may be run in any directory on the system.
# export PATH=$PATH:/opt/gradle/gradle-3.4.1/bin
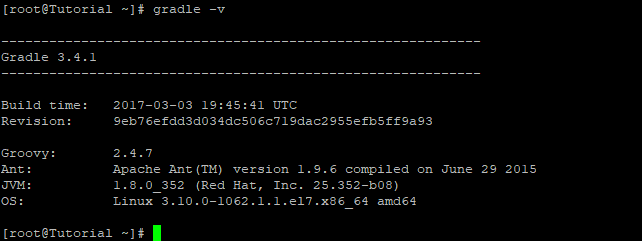
To determine whether or not the Gradle installation was successful, you may check by using the following command.
# gradle -v
Conclusion
Hopefully, you have learned how to install Gradle on CentOS 7.
Thank You 🙂