How to Install Squid Proxy Server on CentOS

Prerequisites:
- CentOS operating system
- Access to a terminal window/command-line (Ctrl-Alt-T)
- A CentOS user with root or sudo priviledges
- The yum package installer, included by default
- A text editor, such as vim
Let's begin the installation.
Login to your server via Putty.
Step 1: Refresh CentOS Software Repositories
sudo yum -y update
Step 2: Install Squid Package on CentOS
yum -y install squid
Now start Squid by entering the following command:
systemctl start squid
To set up an automatic start at boot:
systemctl enable squid
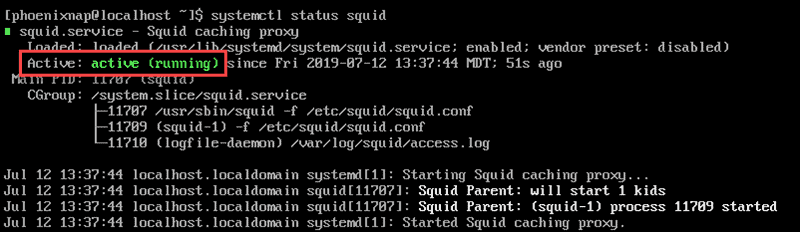
Review the status of the service, use:
systemctl status squid
In the example below, we see that the state is ‘Active.’
Configuring the Squid Proxy Server
The Squid configuration file is found at /etc/squid/squid.conf.
1. Open the file in your preferred text editor (vim was used in this example}:
sudo vi /etc/squid/squid.conf
2. Navigate to find the http_port option. Typically, this is set to listen on Port 3218. This port usually carries TCP traffic. If your system is configured for traffic on another port, change it here:

You may also set the proxy mode to transparent if you’d like to prevent Squid from modifying your requests and responses.
Change it as follows:
http_port 1234 transparent
3. Navigate to the http_acacess deny all option.
It is currently configured to block all HTTP traffic, and no web traffic is allowed as shown below.

Change this to the following:
http_access allow all
4. Restart the Squid service by entering:
sudo systemctl restart squid
Squid Proxy Server successfully installed.
Thank You!