
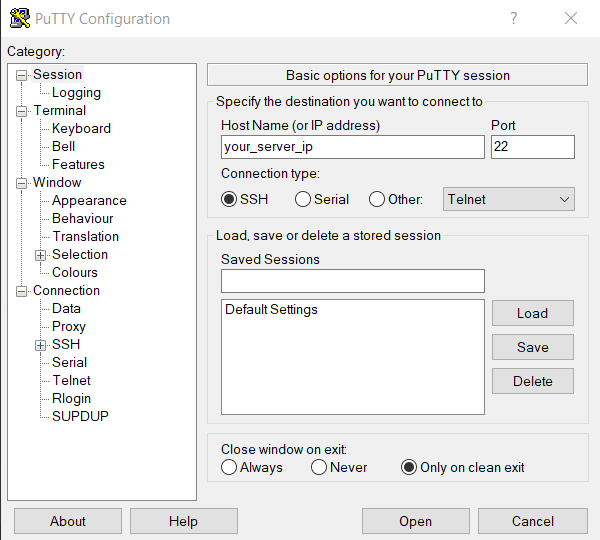
1. Login to the server via Putty (SSH port 22)
2. Set the SELinux in disabled mode, use the following command and reboot your server.
# # sed -i 's/^SELINUX=.*/SELINUX=disabled/g' /etc/selinux/config
3. Restart the server by running
``` # reboot
4**. Install apache and mariadb**
yum update
yum install httpd mariadb-server -y
**5\. Start Apache and mariaDB Services.**
# systemctl enable httpd && systemctl start httpd
# systemctl enable mariadb && systemctl start mariadb
**6. Set Mariadb root Password:**
a. Run: # [mysql\_secure\_installation](https://manastri.blogspot.com/2019/09/securing-mysql-mariadb-with.html)
b. It'll ask for setting the root password. Press Y to do so.

c. disallow remote root login
d. Remove anonymous user
e. it'll drop test databases

**7. Install Zabbix Server with MySQL**
# rpm --import http://repo.zabbix.com/RPM-GPG-KEY-ZABBIX
rpm -Uvh https://repo.zabbix.com/zabbix/4.4/rhel/7/x86_64/zabbix-release-4.4-1.el7.noarch.rpm
8**. Now use the below command to install Zabbix and necessary packages**
# yum install zabbix-server-mysql zabbix-web-mysql zabbix-agent zabbix-get zabbix-sender zabbix-java-gateway -y
**9\. Edit PHP timezon**e
vi /etc/httpd/conf.d/zabbix.conf
**9\. Edit PHP timezone**
vi /etc/httpd/conf.d/zabbix.conf
<figure>

<figcaption>
Save the file and exit.
</figcaption>
</figure>
1**0. Restart httpd service using the below command**:
systemctl restart httpd
**11. Edit create and import initial zabbix database and user:**
mysql -u root -p

\[filecode file\]
Enter password:Welcome to the MariaDB monitor. Commands end with ; or \\g.Your MariaDB connection id is 10Server version: 5.5.60-MariaDB MariaDB ServerCopyright (c) 2000, 2018, Oracle, MariaDB Corporation Ab and others.
Type 'help;' or '\\h' for help. Type '\\c' to clear the current input statement.
**MariaDB \[(none)\]>CREATE DATABASE zabbixdb CHARACTER SET utf8 COLLATE utf8\_bin;**
Query OK, 1 row affected (0.00 sec)
**MariaDB \[(none)\]>GRANT ALL PRIVILEGES ON zabbixdb.\* TO zabbixuser@localhost IDENTIFIED BY "**a\_strong\_password**";**
Query OK, 0 rows affected (0.00 sec)
**MariaDB \[(none)\]>FLUSH PRIVILEGES;**
Query OK, 0 rows affected (0.00 sec)
**MariaDB \[(none)\]>exit**
Bye
\[/filecode\]
**12.** **After creating the Zabbix database and user we need to import the zabbix initial database using the below commands:**
# zcat /usr/share/doc/zabbix-server-mysql*/create.sql.gz | mysql -u zabbixuser -p zabbixdb
**13.** **Now we need to edit database configuration in the Zabbix server configuration file zabbix\_server.conf:**
vi /etc/zabbix/zabbix_server.conf
Specify the database name for zabbix , database user name and the password
DBHost=localhost

DBUser=zabbixuser

DBUser=zabbixuser

DBPassword=YOURPASSWORD

**14.**  **Now enable and start zabbix service:**
# systemctl enable zabbix-server
 ```
# systemctl start zabbix-server&&systemctl enable zabbix-agent
# systemctl start zabbix-agent
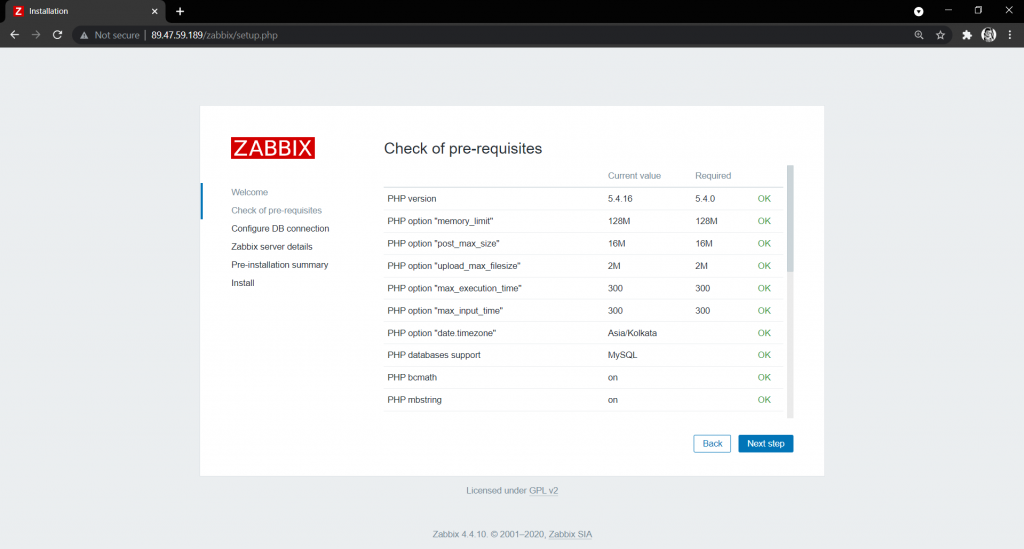
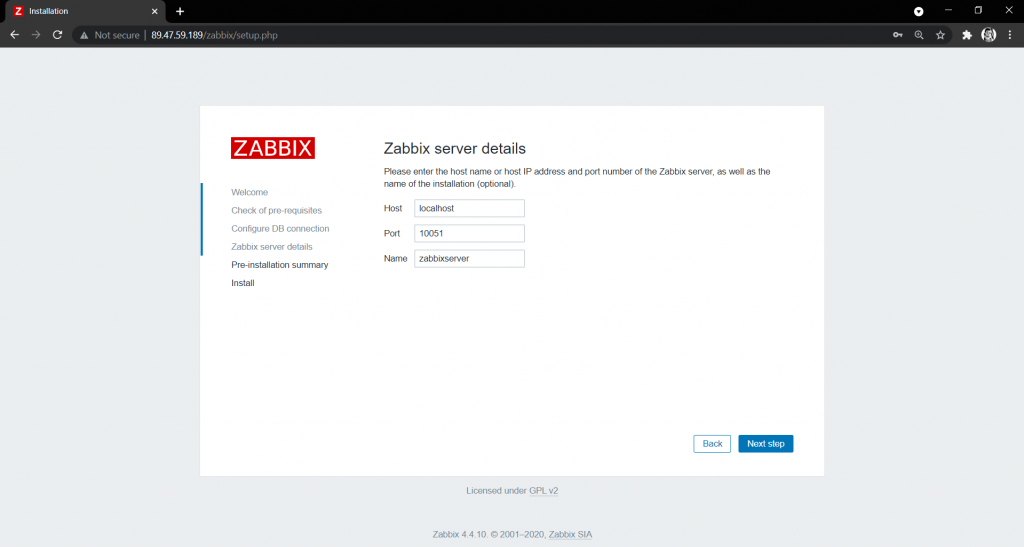
15. Setup Zabbix Web Frontend
Navigate to http://ip_address/zabbix or http://host_name/zabbix
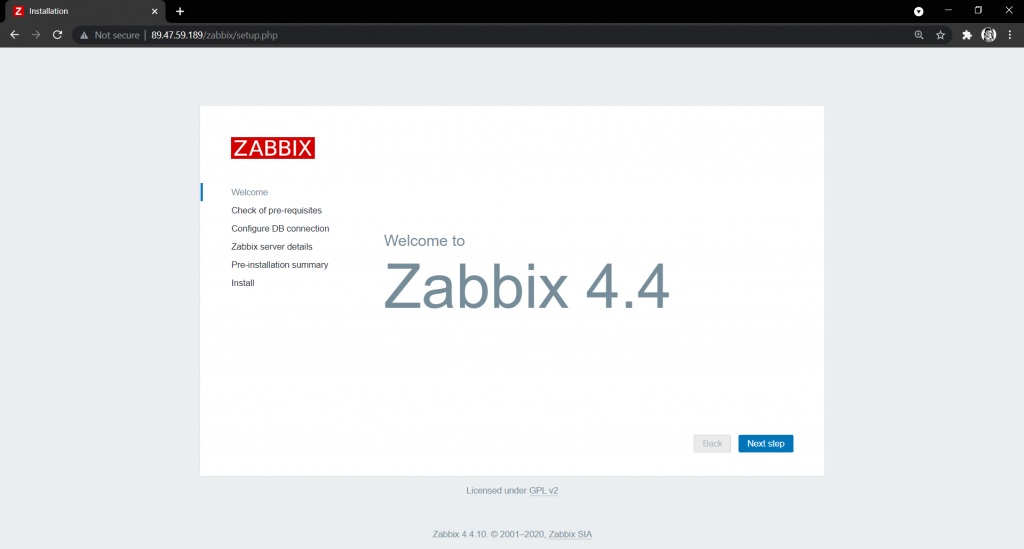
click Next
16. Please enter DataBase details:
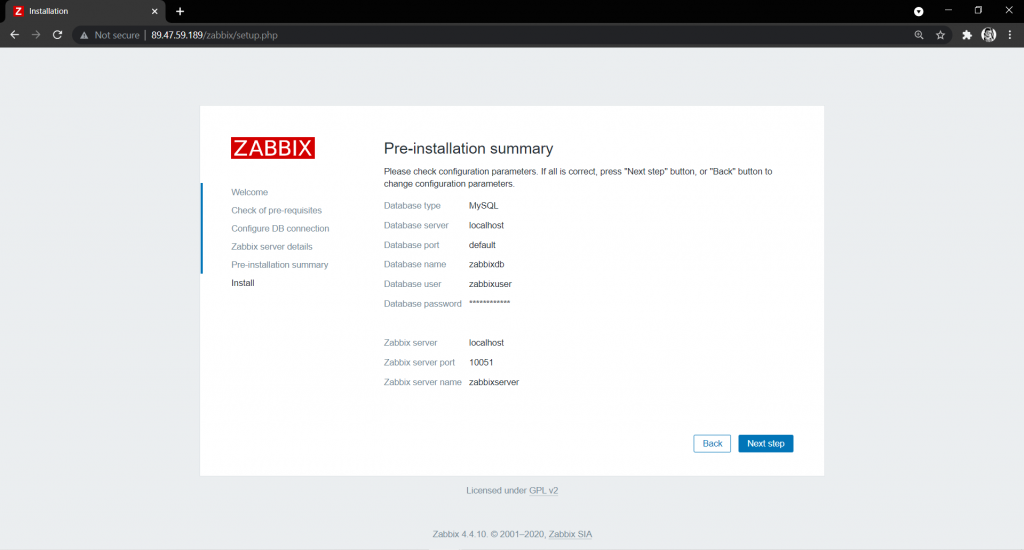
18. Summary:
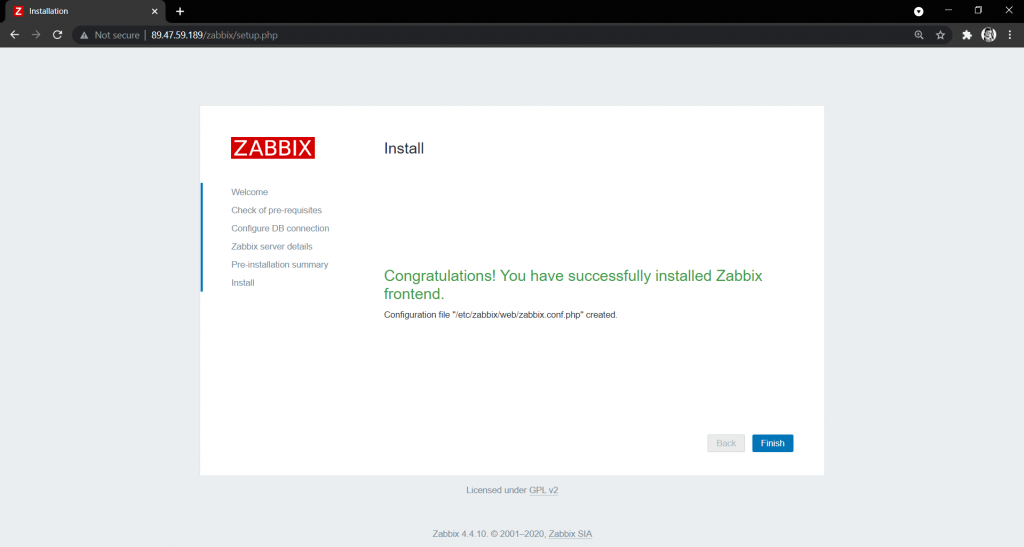
19. Finish the installation:
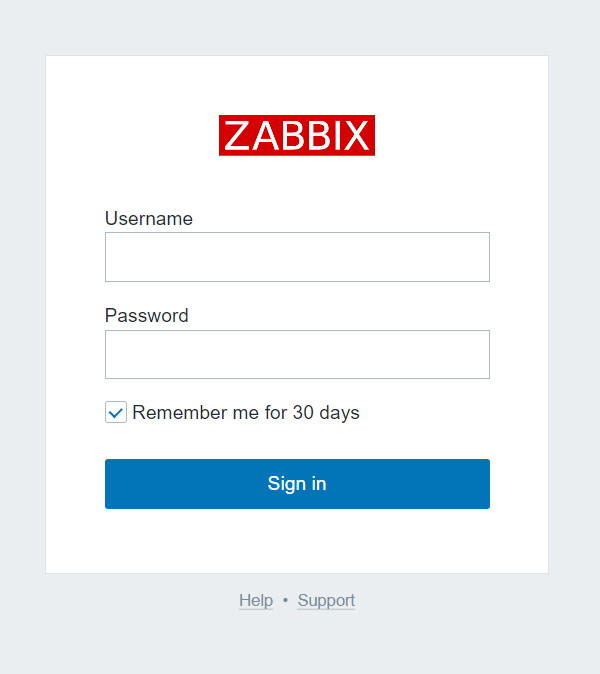
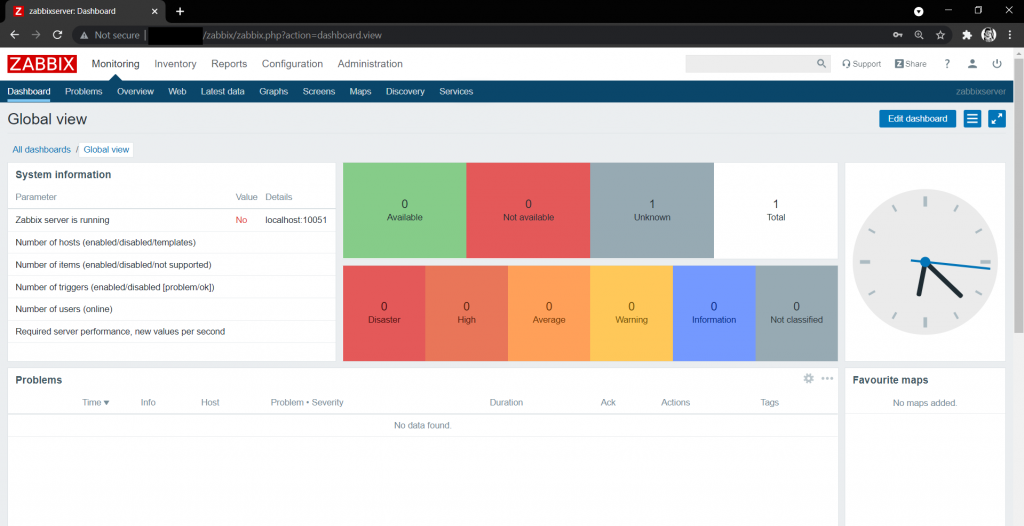
20. Login Prompt:
Default username and password is "Admin" & "zabbix"
Thank You :)